![You suck at protoshop. No, you [i]really[/i] oo.](http://blog.gg8.se/images/you-suck-at-photoshop-you-really-do-your-awful.png)


Pocket Music GBC version GBA fix
December 17th, 2013Readme
 Pocket Music for Gameboy Color refuses to run on GBA. It shows a screen similar to when you run the game on a monochrome Gameboy, saying “this game is intended only for use with a Gameboy Color.”
Maybe they decided to do this because the sample playback sounds like crap on GBA. This patch fixes both those problems. It bypasses the GBA check so you can use Pocket Music on GBA, and it uses my “antispike” fix (also seen in LSDj) to almost completely remove the whine from the sample playback.
Use an IPS patcher to apply the patch to the Pocket Music GBC ROM.
Gameboy project week 9: The EMS cartridges: Something old and something new. Something black and something blue. And how sloppy cartridge design affects you.
March 4th, 2013
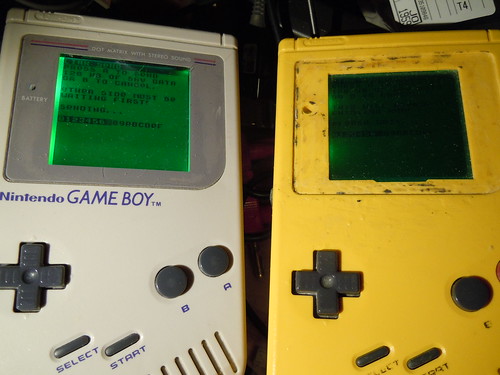
Top left: EMS 32M cartridge, rev 2. Top right: EMS 32M cartridge, rev 1.
Bottom: EMS 64M USB cartridge.
The HKEMS company is probably the oldest manufacturer of Gameboy flash cartridges still in business. Among the original era companies, the most famous was probably Bung, but it eventually collapsed under the legal threats from big N. EMS survived, however, and continues to develop its line of products, including their 64 Mbit GB cartridge.
There’s a thread in the Gameboy dev subforum of NESDev about trouble using the cartridge with certain games. In that thread, I said in good faith that EMS cartridges have good emulation of MBC1’s quirks, but also that I needed to investigate it further. Which is what I’ve done this week. And, I was wrong, at least regarding the newer cartridges.
First a bit of background: The Gameboy CPU is an 8 bit CPU with a 16 address bus. This allows the CPU to address up to 65536 bytes of memory. In that space, it needs to fit all it’s ROM, RAM and control registers. If you want to address more memory than that, you cannot do it directly, but need to employ a method called bank switching. This is done by a chip called an MBC (memory bank controller) which is situated on the cartridge. The normal memory layout seen by the GB CPU is one 16 kiB area of ROM called bank 0 which never changes, and one selectable 16 kiB area to which any 16 kiB window of the ROM (with a couple of exceptions) can be switched in. In bank 0, a game or program can store code and data it wants to have easily accessible.
However, for a flash cartridge this might present a problem if you want the user to be able to choose between different games/programs stored in the flash memory. This is where multi ROM capabilities come into play. Just like the banking lets you select a small window of memory that is visible in the Gameboy memory map, multi ROM lets you select an area of the flash chip which then appears to the Gameboy as a Gameboy cartridge.
From the hardware point of view, there’s an interface that lets you select which portion of the flash chip should be visible to the Gameboy CPU by performing a sequence of writes. If well designed, the multi ROM commands should not conflict with any other commands normally used by any type of MBC, or by writes which exist in a few games especially designed to mess up multi ROM and similar extended functionality and crash the program (as anti piracy feature.)
On the software side of things there’s a menu ROM which scans the flash memory for valid ROM images, presents a menu, and after a user selection performs the special menu sequence to switch the ROM, and finally jumps to the ROM entry point.
I sat down to investigate exactly what the menu ROM does, and what effect each command has on the cartridge. You can see the full report HERE. But here are some points I discovered:
The USB 64M cartridge (as well as the second revision of the blue, pre-USB 32M cartridges) have reduced functionality compared to the original revision of cartridge. This means that some ROMs will have to be patched in order to run on the cartridge in the future as well. Bummer!
The default menu ROM leaves SRAM open (unprotected, [$0000]<-$0A) without good reason. This could potentially trash one bank of SRAM, especially for games that don't use SRAM because they won't enable the SRAM protectopn again.
From a quick glance, it seems like the EMS 64M USB utility finally aligns the ROMs correctly to size boundaries when flashing multiple ROMs through the application. However, the menu still has trouble finding some ROMs in an experiment I did.
The EMS application also pads the files with $00 (all bits zero) instead of $ff (all bits one) which will contribute a microscopic amount to wearing out the flash faster. Will it actually matter, nah, but it’s a sign of not paying attention to detail.
LittleFM 0.5.1
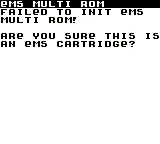
As a proof of concept, I’ve released LittleFM 0.5.1 with integrated EMS multi ROM support. As it is a proof of concept, it does not come with a special patcher, check that ROMs are correctly aligned or handle save data at all. However, to show that I paid attention at least slightly to detail, it does not show repeated entries when used in an emulator, and also gives you an error message if the switching failed, unlike most similar menus.
You have to prepare a ROM yourself, by first patching an LSDj ROM with LittleFM as usual, then concatenating whatever ROMs you want at the end, respecting the alignment of course.
copy /b lsdj-4_7_0-lfm.gb + rom1.gb + rom2.gb out.gb
cat lsdj-4_7_0-lfm.gb rom1.gb rom2.gb > out.gb
Then burn out.gb as the only ROM onto your EMS cartridge, USB or non-USBB. Press start to bring up the EMS multi ROM menu.
Since it doesn’t do save management or anything fancy it’s kind of pointless except maybe for musicians who want noise maker ROMs alongside LSDj on a cart. A future version will be able to store save data in a (compressed) LSDj-like file system, and also come as a standalone menu replacement without LSDj. But that’s for the future.
Looking elsewhere, you have the newly developed menu by MottZilla which I haven’t tried but I’m sure it’s decent. (Discuss on NESDev.)
Gameboy project week 8: The white Nintendo Power official flash cartridge, a tale of reverse engineering, sweat and tears
February 25th, 2013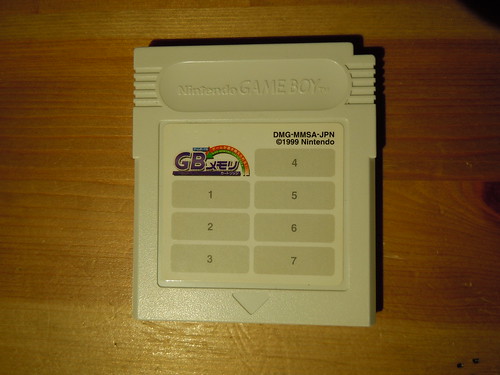
This week’s project concerns this cartridge, the official Nintendo Power flash cartridge. It used to actually be sold by Nintendo for 2500 yen and you could by games from a special kiosk starting at 800 yen at the Lawson department store. (About US$27 and US$9 respectively at today’s exchange rate.) The kiosks are long gone, but the cartridges remain in the wild. (However one page in Japanese from the time remains. It mentions how the launch is delayed because of the earthquake in Taiwan, the massive 921 earthquake)
Since these are flash cartridges they are in theory writeable, which would make them useful for, for example Little Sound Dj or other homebrew software. However, writing to them has proven difficult. The currently only known way of writing to them is with a software called FMGBx by Mootan. The program works but requires flasher hardware that is difficult to get and and in all cases are using an LPT port interface. Options include Bungs GB Xchange, a modified GBA flasher and two homebrew solutions using discrete 74hc logic. Clearly, there’s room for improvement.
Read on…
Gameboy project week 7: A ROM for showing custom graphics
February 19th, 2013As per usual, this week’s project is fashionably late. This week’s project is an image viewer ROM which you can use to show custom graphics on the screen. This is for example useful for modders who want to display a logo on the screen when doing a photoshoot. I’ve been making these ROMs for people on request, but even so, I have been limited to using an old DOS utility (yes, DOS, not just command line) called PCX2GB. However, this application is slow and buggy, and with the advent of 64-bit operating systems, DOS applications can no longer run natively. So for every one of those ROMs I’ve made, I’ve had to start DOSBox, then include the files that PCX2GB output into the project and recompile the ROM.
This project sets out to change that. The project consists of two parts. A Gameboy ROM which can be patched with one or more images, and Python script that converts the image to the Gameboy tile format and does the appropriate patching. The result is a Gameboy ROM you can use to show the images.
Prerequisites
The patcher is a Python script, which means you need to install Python to run it. You should install the 32-bit version of Python 2.7 — the one marked x86 instead of x86-64. Sorry to those who prefer 3.x.
Additionally, you need PIL, or Python Image Library which is used to load the image files.
How to use the patcher
To use the patcher you need to prepare as many images as you want, which are exactly 160*144 pixels and color reduced to contain a palette of exactly 4 colors/shades of gray. The actual color depth of the file can be anything, as long as the image contains exactly 4 unique colors. The image can be in any format that PIL can load, which is almost any format. Avoid using JPEG images however. Use PNG, GIF or BMP.
When you have correctly installed Python 2.7 and PIL, you can use the patcher by giving the following command, with sample output:
python pygbconv.py out.gb image1.png image2.png image3.png
===Processing image1.png
Optimized image to 127 tiles.
===Processing image2.png
Could not optimize image to below 256 tiles. Image stored as 360 tile image.
===Processing image3.png
Warning! Image has only 2 unique colors (instead of exactly 4.) Color table will
 amended.
Optimized image to 5 tiles.
===Processing image4.png
Could not optimize image to below 256 tiles. Image stored as 360 tile image.
===Processing image5.png
Could not optimize image to below 256 tiles. Image stored as 360 tile image.
1
The first agument, is the name of the GB file to be produced. This is then followed by any number of image file names (up to potentially 256 images.) The output tries to be informative about what the patcher is doing.
imagerom.gbbase
imagerom.gbbase is the actual viewer code. This is used as the base ROM for the finished product, thus the different file extension. If you run this standalone (which there is no point in doing) you will see an X shape and hear two dissonant tones, as a warning message.
The Gameboy software
The Gameboy software is dead simple. Press left or right to scroll through the pictures or press A to invert the palette
Note on the inner workings of the patcher and ROM
The Gamboy graphics hardware is working with tiles, which are addressable 8*8 pixel blocks. If an image has repeated instances of the same 8*8 pixel area, those can be addressed as the same tile. The patcher tries, if possible, to “compress” an image this by removing redundant tiles. However, if an image contains more than 256 unique tiles, it instead displays the image with no repeated tiles, for a total of 360 tiles being displayed on the visible area of the DMG screen.
The download also comes with a cople of image that you can play around with until you make your own image.
Gameboy project week 6: Can I have an A-MEN?
February 11th, 2013Fixed the download link at the bottom of the post.
I’m tired. I need a break. What better choice than the amen? Probably a dozen, but nevermind that.
This week’s ROM is a sample masher that lets you apply live effects and rearrangement to a loop. As such, it’s using the wave channel. During the development of my sample playback routine, I accidentally discovered a solution to an old problem. The wave channel on the Gameboy has a buffer containing 32 samples, or 16 bytes which is normally used to store a repeating wave form such as a sawtooth wave, square wave or sine wave. However, if you continually reload the buffer with new data, you can play a sampled waveform. This is all well except that the channel needs to be stopped before the buffer can be reloaded. The problem is that this causes a small spike in the waveform. It is noticeable on a DMG, but completely abhorrent on a GBA, to the point of making kit instruments unusable. I found a solution to this problem which is simple and elegant, which is to simply turn off the channel in ff25, the sound routing register, while the buffer is being refilled.
With some swift work from Johan, this fix, which I call the antispike fix, is now included in the latest version of LSDj, 4.7.0. And kit instruments now sound eh-ok on GBA.
So, this week’s ROM is a simple, GUI-less ROM which lets you process a short loop, for example an Amen. This is another “failed” project in that it doesn’t have all the functionality I originally wanted to include. Here’s the functionality in this version of the ROM:
- You can press start to start or stop playback of the loop.
- The loop can be freely pitched by pressing select+up/down.
- While the loop is playing, the ROM sends out an LSDj compatible sync signal on the link port.
- You can press the D pad to rearrange the loop in 16th “slices”.
- You can apply effects by holding either B or A, or both. B enables a granular/repeater effect. B+up/down controls the repeat size. A enables a stutter effect. A+left/right controls the stutter length.
- Effect values can not be changed while one direction on the D pad is held down. While this might sound strange, the purpose of this is that you could be able to “roll” around on the D pad to mash the beat while an effect is triggered without changing the effect values.
- Finally, you can press select+start to enable a “special” effect. When this effect is active, the pitch of the wave channel does not follow the general pitch of the loop. This causes a phasing type effect when adjuting the pitch.
Sound examples, some notes on the development process as well as information about how to replace the sample with your own sounds will follow shortly.
Fixed link: Download
Gameboy project week 5: LittleFM 0.5 (finally) released
February 4th, 2013This week’s project is (again) slightly late, but hopefully worth the wait. This is the latest and greatest version of LittleFM, and alternative file manager for LSD. Here are the key features in this version:
Key features
- LittleFM now comes with a Java based patcher application for easy application to any unpatched LSDj ROM, including (most probably) future versions. No more IPS patches that only work with a single version of LSDj.
- LittleFM is fully Drag’n'derp compatible. This includes interfacing with the virtual “file system” of the Derp and making sure that any song data stored in flash will be copied back when you copy the GB file off of the cartridge.
- LittleFM now supports song trading over a link cable. Currently only in the form of transfering a whole 128 kB sav at a time, but this may still be useful for backups and redundancy.
- LittleFM now checks that the SRAM is ok, both in terms of hardware and corruption. If the SRAM is corrupt or uninitialized, LittleFM will offer you to initialize it, but also to leave it as is. If the SRAM is malfunctioning on the hardware level, the program will halt with an error message.
- The stupid screen scroll bug is gone! You can now scroll to the bottom of the song list in SAVs with 32 songs, without problems.
I’ve also made a number of under the hood tweaks and small bug fixes.
Some notes on the features
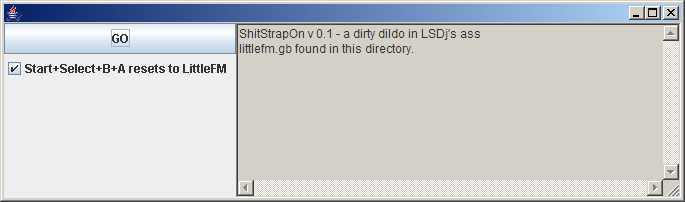
ShitStrapOn, the patcher application
If you have Java installed, starting the application should be as simple double clicking the file. Should you need to execute it manually from the command line, you should be able to run it with something like java -jar ShitStrapOn.jar
The patcher will ask for three things, a clean LSDj ROM, the littlefm.gb file, and a location where to sav the output. However, it will search for littlefm.gb and not ask for it, if the program finds the file in the same directory as the .jar file. A clean LSDj ROM means one that has not been patched with LittleFM and does not contain any LittleFM save data in ROM. The ROM may still have ny number of kits, so long as there is one free slot where LittleFM can reside.
The name originally meant bootstrap for Shitwave. Since, then, however, the project has come to be used for patching LSDj ROMs with LittleFM. If you’re offended by the name, (or the subtext, a dirty dildo in LSDj’s ass,) too bad for you.
Link cable support
The link feature is a hardware feature, and any attempt to use it with any emulator is likely to end in missed bytes and tears. In my experience so far, it works perfectly both between a DMG and a DMG, and a GBC and a DMG. A GBC can send data about twice as fast DMG. (Well, it can transmit much faster than that, actually, but the *2 mode is what I’ve found to be safe for these transfers.)
LittleFM will show a progress bar as the transfer progresses. If all is well, both sides will move their progress bar in synch, and will both show OK on their respective side. If a transfer is stalled, it is safe to turn off the Gameboy, as long as no data is currently being actively transmitted or received.
You can use the Nanoloop MIDI adapter with, sort of. Sending data from the PC usually works ok-ish. However, make sure that the receving Gameboy shows ok at the end of the transfer, and that songs load correctly when the transfer is finished. Receiving data from the Gameboy to the PC can work but is extremely touchy. You may lose bytes in transit, with or without an error message. Be extremely wary of corruption, and make sure the received file is 131072 bytes big. Not a single byte less or more! Remember, unlike LSDj’s own file manager, LFM will give you an error on almost every kind of corruption, so use it to detect errors early.
Please also the previous post about LittleFM 0.4.The same basic precautions apply. Pressing erase flash in the Bleepbloop/Smartboy etc type flasher application will delete all songs stored in flash. Save project will overwrite whatever was in that flash slot before.
Have fun and be safe, and report any issue to me.
And a quick plug: If you have an older flash cart (for example belonging to an older LPT port flasher) then I would like to borrow the cartridge for a while for science, to make it work well with LittleFM and other software I have in the pipeline.
Gameboy project week 4: A test/”welcome” ROM
January 28th, 2013This week’s was supposed to be a MIDI controllable version of Shitwave, and while that’s done, I found out it was a bit less exciting than I was hoping for, so I want to try to come up with some new ideas for that. However, I found a new project to do over the weekend. beware, the author of BGB (Gameboy emulator and debugger) mentioned that he wanted to include a ROM with the emulator (not specifically mentioning me) that a new user of the emulator could use to test the emulator, without having to go to a different site to find a ROM. These are his criteria for this ROM:
- Should show some form of graphics, and ideally show some form of animation.
- Should play sounds.
- Should show the user which buttons are currently pressed.
All these things are potentially useful in case the emulator (or the configuration of the emulator) is not working correctly for some reason.
For this week’s project I’m also including the source code. I pondered whether to do this or not for a couple of reasons. One reason is code vanity. When you release the source code for something, it lets other people judge the code. I would describe my programming style as casual and chaotic. This means that in a lot of cases I make things up as I go along. This means that sometimes I do things in ways that are “wrong”, or only works under certain circumstances, or are unnecessarily tedious. Another risk with releasing the source code is that people will invariably ask you for help in private communication. There’s not necessarily anything wrong with that per se (unless the question is stupid) and I try to answer questions I get in my inbox, but it may not be the most efficient way to get an answer. You may want to try my Gameboy development forum or perhaps more realistically if you want people to see your question, NESDev’s Gameboy subforum. Or #gbdev on EFNet if you use IRC.
The program
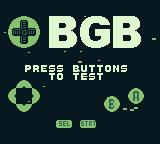
The program in its current form shows the BGB icon, BGB in a big font and the text “press buttons to test”.
There’s a starfield in the background with 24 indiidual stars, made up of sprites. The stars travel from right to left and can travel at three different speeds (1, 2 or 3 pixels per frame) and there are two types of stars. Their Y positions are determined by an LFSR random number generator.
When you press one or more buttons, an indication is shown on the screen. A note is also played. I wanted to get this function right. The scale used for the notes is a mixolydian scale (or, major scale with a flat 7th) because plain major scales are boring. The note are played duophonically by alternating between the two pulse channels, so you can play two note chords. And the program also alternates between playing the actual note and playing it slightly detuned. This gives a slightly phasey sound when playing the some note multiple times, which in my opinion sounds better.
There’s also a melody played on the wave channel, which pseudorandomly generated by the same random number generator which is used for the stars. It plays notes from the same scale, but if you want you can turn it off by pressing select+start, say if you want to actually use this ROM for playing melodies.
The ROM also has an easter egg, which you might be able to find.
The ROM currently says BGB, but if you want, I can customize it for you to show your own logo, if you want to use it as the standard ROM to come with cartridges you sell. (The usual suspects, you know who you are.)
Read on…
Gameboy project week 3: A simple MIDI ROM
January 20th, 2013nitromidi1 is a very simple Gameboy MIDI ROM. It can be used with an Arduinoboy or Nanoloop USB MIDI adapter. It’s not meant to be all that practically useful atm. Rather, I created it to have all the plumbing in place for future MIDI software.
It currently responds to the following things:
- MIDI channel 1 only.
- Gameboy pulse channel 1 only.
- Note ons. (But currently not note offs!)
- The typical “panic” button. (Channel mode messages $7B, all notes off and $78, all sound off.)
- The pitch wheel, currently with a fixed range of +/-7 semitones.
- CC 71/$47 which controls the pulse width of the wave.
- CC 72/$48 which is a combined attack/release control, ie. the second nibble of the envelope byte. The control scans from short decay to long decay to constant volume output to slow rise to fast rise. In other word, the following envelope values mapped onto a knob: 1-7,8,F-9.
As noted above, it doesn’t respond to note offs, so be careful with rising envelopes! - It has no GUI except a lines pattern indicating CPU usage. This is literally
made by changing the background palette when the CPU is busy.
Have fun, and report any bugs/anomalies/feature requests.
Mystery ROM explanation
January 16th, 2013^ The ROM in action.
So, what about the mystery ROM? If you try to run the ROM in an emulator, it will do nothing. If you try to run the ROM on actual hardware, preferably a DMG, you might hear the faint sound of the first couple of bars of the Super Mario Bros overworld theme if you hold up the speaker to your ear. But what is the relevance of this?
Read on…
Gameboy project week 2: Mystery ROM!
January 13th, 2013This week’s project is a mystery ROM. It’s a ROM that does nothing. Or maybe it does something, but it’s so subtle that you may not be able to detect it. Or if you think you do, maybe it’s you imagination?
Download the mystery ROM and see if you can figure out anything about it…