![You suck at protoshop. No, you [i]really[/i] oo.](http://blog.gg8.se/images/you-suck-at-photoshop-you-really-do-your-awful.png)


Arduinoboy for Arduino Pro Mini 5V (PCB giveaway!)
July 5th, 2009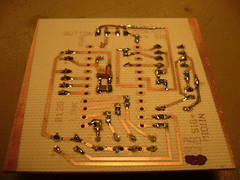
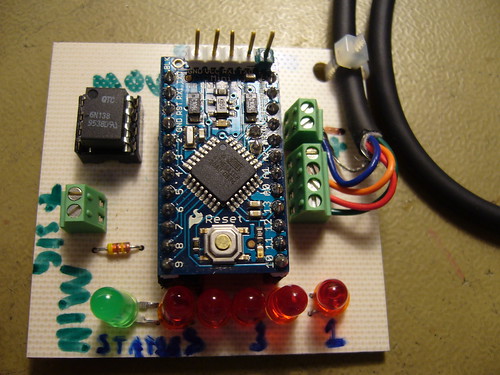
So this is my version of an Arduinoboy board which, unlike other designs (?) is using an Arduino Pro Mini as the base, SMD resistors and capacitors instead of hole mount ones and is using screw terminal blocks for external connectors.
I’ll share the design of it as soon as I’ve straightened out a couple of small design errors. The two-terminal blocks have small pins that are supposed to go through a hole in the PCB for added stability. I drilled these extra holes even though some of them destroyed copper leads. (That’s what the patch leads are for in the upper left picture) The LED’s are also a bit to close to each other.
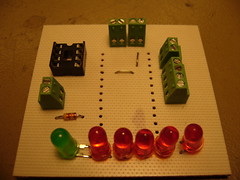
I’ll redesign the board and etch a new board with the fixes. But I’ve already etched two boards with the old layout, and I was going to trash one of them, but if anyone is interested, I can send it to you at the cost of the shipping. The board is equipped with as shown in the upper pictures. I’ll also add the pin headers needed to connect the Arduino to the board. I can also attach (relatively low-intensity) LEDs. NO peripherals are included, so you’ll need an Arduino Pro Mini 5V, 6N138, a link cable, power supply (Unless you did the Taco-04 Taco swap mod), MIDI jack and a button if you want that functionality.
If you’re interested, leave a comment or mail me (My e-mail address should be visible below)
July 5th, 2009 at 6:47 am
I want an arduinoboy =( that is really nice of you though. you is awesome guy. I couldn’t make much use out of something like that though. put me behind a soldering iron and Ill burn down the house somehow lol
July 9th, 2009 at 8:55 pm
This is great! I’m super glad that someone’s working on this, as I got soundly defeated by the complexity of Eagle when I tried. Seeing as how my arduinoboy is so huge it has to live in a tupperware container, I’ll be looking forward to a finished PCB design that supports the smaller arduinos. I do have a few questions, if you don’t mind:
What type of terminal block are you using? One of the hardest parts of building mine was soldering those little wires, so that looks awesome. Do you have a part number so I can figure out what I’m looking for?
Also, a version of the layout that could accommodate non-SMD components would be great, if you have the inclination. I’ve got a ton of resistors, but no SMD parts lying around.
Thanks for taking the time to make and share these. I’ll be watching for news.
July 12th, 2009 at 1:03 am
You’re a very generous chap.
July 14th, 2009 at 8:01 pm
I might be interested in a PCB but can the Arduinoboy sync 2 gameboys to midi? I haven’t been able to find anywhere that says it can. I know the LSDJ-MC2 can but I’m struggling to get the one I built working.
July 29th, 2009 at 5:04 am
So someone beat me to it. Congratulations, sir. Did you make the board at home or did you have it built by a fab house? Also, did you manually solder each resistor, or did you use a hotplate or a toaster oven and do some reflow soldering?
July 29th, 2009 at 5:42 pm
I did it at my university which has professional but pretty old-fashioned equipment. I’ve described the process here: http://gameboygenius.8bitcollective.com/wordpress/2008/12/19/pcb-manufacturing-at-my-university-pictures/
And, yes, I manually soldered each resistor. I don’t have access to an oven, and besides soldering 0608 resistors by hand is not terribly hard. (If you have a good pair of tweezers and a good soldering iron) Even soldering surface mount IC’s shouldn’t be too hard according to one of my friends. What you do is you first attach one or two pins, to fix the IC in a position. Then you put excessive amounts of flux around the pins, place a string of solder alongside the pins on one side, and gently stroke the hot soldering iron along the pins. This way, the solder is supposed to keep in place and don’t create short circuits. I haven’t tried this method yet, but I will when I get a reason to solder a surface mount IC the next time.
November 4th, 2015 at 12:48 pm
Nice article. I am thinking to working on Arduinoboy for Arduino Pro Mini 5V.
March 25th, 2019 at 1:44 pm
[...] Arduinoboy for Arduino Pro Mini 5V (PCB giveaway!) Share this:PocketTumblrPinterestTwitterFacebookPrintLinkedInEmailRedditLike this:Like Loading… [...]