![You suck at protoshop. No, you [i]really[/i] oo.](http://blog.gg8.se/images/you-suck-at-photoshop-you-really-do-your-awful.png)


zMashup (Homemade beat masher audio sample)
October 24th, 2009zMashup by nitro2k01(Gameboy Genius)
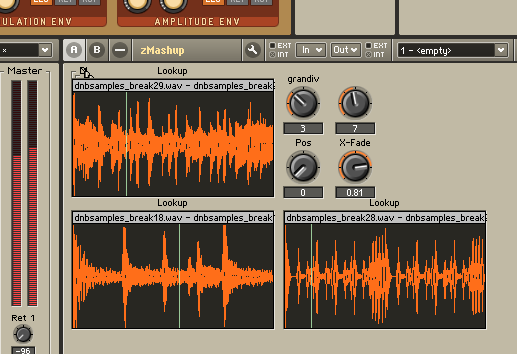
I’m testing out a beat masher that I’m building in Reaktor. Everything you hear is algorithmically and/or randomly composed, although the parameters could of course be controlled via the keyboard. The actual masher can do rearrangement, instant repeat, reverse and high pass. For extra complexity, the masher is controlling three breaks simultaneously, which it fades between with different positions for the left and right channel.
The melody is played by Subharmonic’s default patch. The notes are randomized white keys. (White keys are lame, I know)
Now I just need to make the auto-masher vary the sound more over time.

The Chinese pirate Dell PSU
October 20th, 2009When I bought a used Dell Latitude D600 a couple of years it didn’t come with a power supply, so I had to get one online. I found a PSU on eBay that looked legit for $50. When I got it, when first thing I reacted to was a faint smell of electrolytic capacitor, but the PSU seemed to work well enough. As time passed by I started having slight problems with it. There was interference from the PSU when plugging it into anything audio related. (Unplugging the PSU killed the interference) This intereference was even so strong that it could make the LED on my Arduino Protoshield glow faintly. I tried plugging it into a grounded power outlet, with little difference. Later, the cable dried out and cracked open in several places, which I fixed with cable ties and hot glue.
But heck, I just blamed the dry cable and smell of electrolyte on the fact that the PSU had been lying on a shelf for a few years, and in general, Dell’s crappiness. After all the thing looked and felt solid, and BIOS reported it as a genuine 90W Dell spply. But so came the day when the cable broke seroiously and I had no choice but to open the PSU and solder the cables in place. I was pleasantly surprised that the PSU case was easily forced open, until I saw the inside.
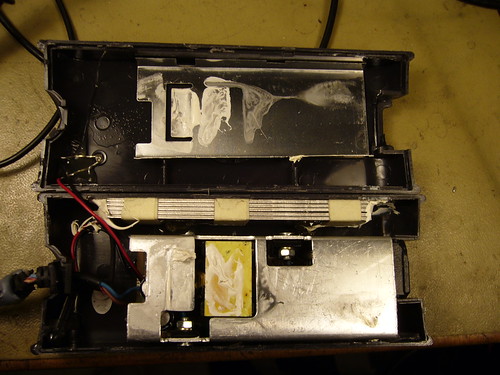
The untrained eye might not be able to see what’s wrong here, so let me explain. First off, the actual PSU is mounted inside a case that is way too big. This is in itself is a clear sign that the thing is not genuine. But what’s more, do you see the 5 metal plates taped together on the side of the PSU? An advanced high precision component? Magnetic field absorber? No, that’s simply a weight with no other purpose than making the thing appear solid. And the really crappy thermal grease that should never have survived past the year 2000. What’s a lot less noticeable is the small thing at the bottom left of the case. It’s a two-pin serial EEPROM, which only purpose is to feed the laptop a few bytes of information that will lead it to believe it’s hooked up to a genuine PSU.
Let’s look under the shield.
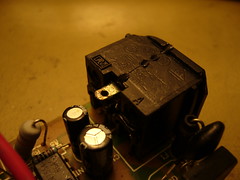
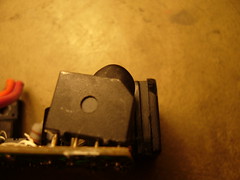
The left picture shows the mains power connector. Ground is not at all connected, which it normally should be to help filter out interference. No wonder I had those intereference problems. Also notice the guck on the connector which was even worse before tried to clean it with flux. The right picture shows the rectifier which is not mounted straight. While this is not a functional problem, it’s a sign of bad work. Also, the shield was not connected anywhere meaning it did not have the noise suppressive effect it might’ve had if it was connected to eg ground. Not shown is the leaking capacitor which most probably contributed to the interference as well. (Because it couldn’t properly supply the switching circuit with current fast enough)
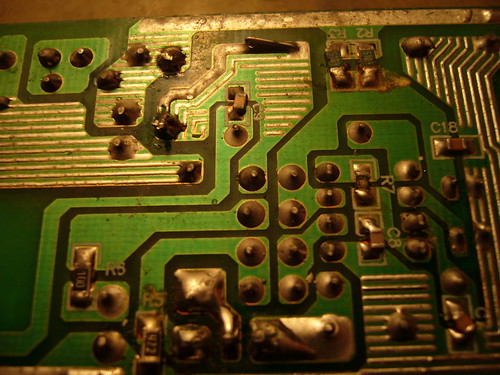
Here’s the bottom of the PCB. Notice how dirty the PCB is and how a lot of the surface mount components are not mounted straight. Also notice the solder joint at the bottom center where the parts of the joint have a slightly different texture one with more and one with less corrosion. This is a sign the soldering of these two component were not done at the same time.
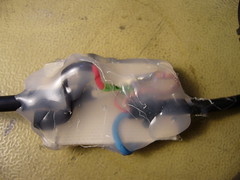
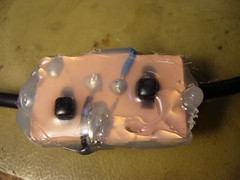
The solution to all this? Well, I tried to fix the PSU, but gave up - it was just too crappy. So I took an authentic Dell PSU which was working but had a different connector than the one on my computer. So I spliced the cable from the PSU with the connector for the pirate PSU. Instead of just covering the wires with shrinkwrap, I decided to splice the cables using a small board, for two reasons.
1) So I could connect the serial EEPROM and make the computer think it’s using an authentic PSU. This time with good conscience since the PSU is authentic, only that the PSU has no way of telling the computer.
2) So I could fix the cables to the board with cable ties and thus decrease the tensions on the cable solder joints.
And then finish it up by covering the whole thing in hot glue for protection.
Lo and behold, no more interference, not to audio equipment, not to my body (!), not to the oscilloscope when analyzing something important.
Downtime and new hosting
October 20th, 2009If you’ve been wondering why my blog was offline or threw an error for some time, it’s because the palce where I hosted it up until now was a shell server, Nic Nac Project which got hacked (rooted). As a result, every file on the server named index.php got corrupted, and possibly other things too. At the moment the NNP server is offline due to this problem.
However, my decision to leave NNP had nothing to do with the hack, but was a decision I made because Binero had a campaign where they offered dirt cheap web hosting for existing Binero domain owners. So that’s why also took the step to finally rid myself of the long domain gameboygenius.8bitcollective.com and switch to the much shorter and easier to remember blog.gg8.se. Because of that I have a clean backup of the files from right before the hack. (Perfect timing ![]() ) Currently redirects are in place from gameboygenius.8bitcollective.com which should take care of any blog posts, but any other files or stuff previously stored on the server (Including some images, although most of my images are stored on Flickr) will not work for now. Everything will be 100% within a few days though.
) Currently redirects are in place from gameboygenius.8bitcollective.com which should take care of any blog posts, but any other files or stuff previously stored on the server (Including some images, although most of my images are stored on Flickr) will not work for now. Everything will be 100% within a few days though.
Yay, my Mac crashed!
October 16th, 2009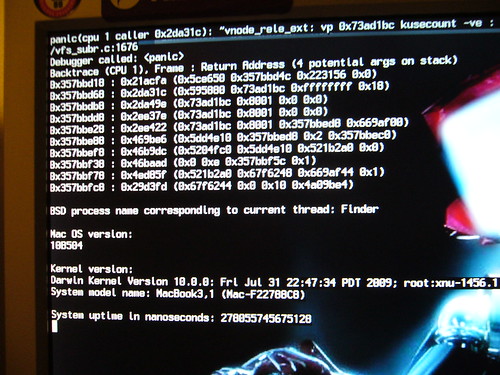
Last night, my Mac crashed. For real. The thing core dumped without warning or apparent reason. Maybe because I’m using MacFUSE/NTFS-3G? A very rare occurrence in Snow that I’ve stumbled upon? I’m not sure, but I shat brix when I saw it.
Also, notice that despite the monitor, this is not a Hackintosh. As the text says, it’s a MacBook, apparently version “3,1″, which I’ve connected to an external screen and keyboard because the internal screen and keyboard are broken.
Plogue Chipsounds Promo EP out now
October 10th, 2009Chipsounds:
Renoise MIDI parameter control:
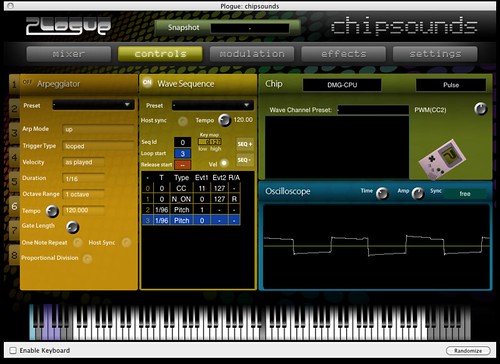
The promo EP for Plogue Chipsounds has been officially released. My track Ecchi6 is an experiment where I tried to, as faithfully as I could, transcribe an existing LSDj song into Renoise+Chipsounds. I was careful to respect the channel limitations of the Gameboy (Only use 4 channels at any one time, and kill offending notes) and use the same settings and and identically designed effects as far as possible. One example is the emulated wave channel echo where I actually created a second CS instrument with a lower volume to emulate the effect used in the original song. Here’s the original for reference.
Although this type of reconstruction is non-standard usage, I’m pleased to say that even if there’s a small difference in sound between the original and the the CS version, I somtimes got confused as to which track is which during my A/B sessions.
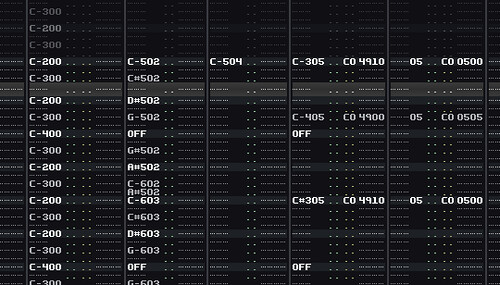
The track was a Gameboy track, and even though I’m not closely familiar with other chips, I can tell that the SID emulation sounds pretty good. And with the help of the “Wave Sequence” section, you’ll have fine grained, tracker-like control of any parameters you choose. Quite simply put, it beats the s*** out of any other single chip emulation VST currently available.
Chipsounds is set for next week and is a must-have for anyone who’s seriously interested in chip sounds but don’t have access to the real hardware.