Newly discovered videocast - The Fat Man and Circuit Girl
January 15th, 2009The Fat Man and Circuit Girl Cast 6 from Jeri Ellsworth on Vimeo.
Watch this. Srsly. Lots of tasty geek stuff in there related to music and tech-craft in general, including a discussion how to feed a C64 with a proper 60 Hz signal for the RTC, a mechanical “steampunk-esque” wristwatch and a thing that produces sound through electric discharges, much like a Tesla coil.
The next episode will air the day after tomorrow, Friday 1/16, 7PM Pacific, 10PM Eastern, 3AM GMT. I’ll be watching it with interest.
The Fat Man and Circuit Girl - Info page
The Fat Man and Circuit Girl - Vimeo
Burning Chrome by Haujobb (Mortimer T music)
January 15th, 2009Here’s an Amiga demo from 1996 with one of my favourite .mod composers, Mortimer Twang. I like his Junglist/DnB/Dub/Jazz module better than his chips, but he seems to despise the fomer somehow. Maybe it’s true what they say, that the earliest works of any artist are the best since they happen during a discovery process.
- Video on YouTube: link me beautiful
- Prod page on pouët.net: link me beautiful <Fuckings to ps!>
- Download (almost) all of Mortima’s modules in one package: link me beautiful <The ones in the demo are closest dream.mod and burning chrome end.mod. jsyk.>
If you’re using glitchDS, also check out my Mortima T sample pack for it.
Photoshop Billboards (Street Art)
January 15th, 2009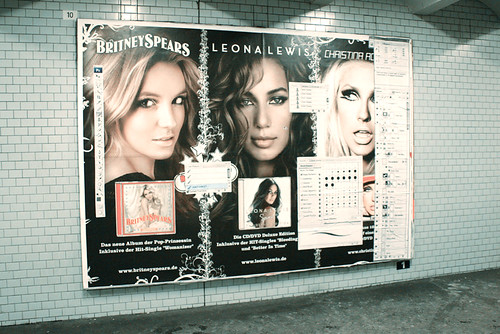



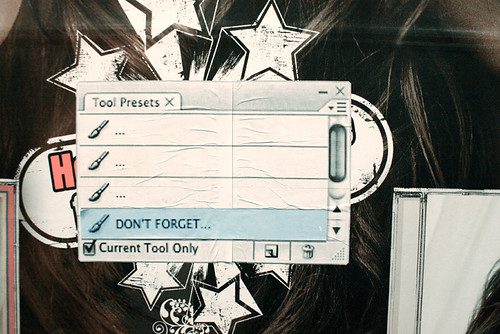
I’ve recently talked about how you can have fun with video billboards, but you can have fun with regular billboards too, as these Berliners show. The theme is Photoshopping of female singers, demonstrated by overlaying the billboard for Britney Spears, leona Lewis and Christina Aguilera with a Photoshop interface. The layers are called things like ****Consume****, Eyes 2C, “Tits da Bitch!”.
To me this is what street art is about: bringing consciousness to the public through the use of satire, and criticizing society through the use of unauthorized art.
Made by Epoxy, Mr Talion, Baveux & Kone. Watch the full set.
Lavos’ Cave v1 (Ambient/drone music piece) + some fail poetry
January 11th, 2009

Here’s the first mixdown of this piece that I’ve dubbed Lavos’ Cave. The name, of course, is an hommage to one of the greatest RPG’s.
It’s an ambient/drone piece that I’ve made by layering several feedback loops. The result is a really moody and organic sound that slowly progresses as you meditate and travel through an imaginary cave.
This is just the first crude version. I will make a final mixdown later where I fix some of the nasty clipping and equalize the tracks a bit to make them stand out a bit more against each other. The clipping is due to the fact that this piece was recorded using feedback paths in analogue gear (except for the reverb which is technically not analogue but mechanical ![]() ) so things went out of hand sometimes.
) so things went out of hand sometimes.
Download: http://www.megaupload.com/?d=0K7HDFSS
And some random thoughts that crossed my mind on my way home the other night. Some kind of failed emo poetry or something.
I could take a picture of the ice
Try to remember the endless perfection
With which it revealed itself.
A splendid crystalline structure, a comples cavity,
Leading to an infinite grid of tunnels.
Just like in my autistic childhood fantasies
Ever so cold, ever so distant, ever so near
The place where I want to rest my mind forever
Exploring new paths, new places
With no one interrupting me
^ That’s something I scribbled down in my notebook when waiting for the bus, too tired, too caffeinated. Fits the mood of the music perfectly.
XKCD Binary Heart Transcription+the SCH mystery
January 4th, 2009
Since I felt like having too much time, here’s a transcription of XKCD Binary Heart.
111011101100110010101
111001010011110111010
101101001011011000100
111101110110011001010
111100101101111011101
010110100101101100011
011110111011001100101
011110010100111101110
101011010010110110001
001111011101100110010
101111001010011110111
010101101001011011000
110111101110110011001
010111100101101111011
101010110100101101100
010011110111011001100
101011110010110111101
110101011010010110110
001001111011101100110
010101111001010011110
111010101101001011011
000100111101110110011
Interpreted as ASCII written with binary, it says:
iloveyOu
ilOveyou
iloveyOu
ilOveyOu
iloveyou
ilOveyou
ilOveyOu
ilOv
That’s the easy part of the mystery. The tricky part is why the O’s are lower and upper case like that. I have no clue, but there’s a discussion on the XKCD forums . Someone called “kemosabi” posted a Perl snippet that produces the letters SCH:
#!/usr/bin/perl
while () {
   $x .= $_;
}
$x =~ tr/01//cd;
$y = pack(”B*”, $x);
print “$y\n”;
$s = $y;
$s =~ tr/Oo/01/;
$s =~ tr/01/ /c;
print $s, “\n”;
$s =~ tr/01//cd;
print ”       ” . join(”       “, grep(/\d{5}/, split(/(\d{5})/, $s))), “\n”;
print ”   010 ” . join(”   010 “, grep(/\d{5}/, split(/(\d{5})/, $s))), “\n”;
#print $s, “\n”;
$s = “010″ . join(”010″, grep(/\d{5}/, split(/(\d{5})/, $s)));
print pack(”B*”, $s), “\n”;
__END__
011010010110110001101
111011101100110010101
111001010011110111010
101101001011011000100
111101110110011001010
111100101101111011101
010110100101101100011
011110111011001100101
011110010100111101110
101011010010110110001
001111011101100110010
101111001010011110111
010101101001011011000
110111101110110011001
010111100101101111011
101010110100101101100
010011110111011001100
101011110010110111101
110101011010010110110
001001111011101100110
010101111001010011110
111010101101001011011
000100111101110110011
Output
iloveyOuilOveyouiloveyOuilOveyOuiloveyouilOveyouilOveyOuilOv`
  1   0   0   1   1   0   0   0   1   1   0   1   0   0   0
       10011       00011       01000
   010 10011   010 00011   010 01000
SCH
Fast forward a few episodes to this strip:
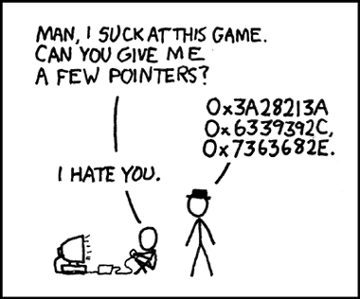
The three “pointers”, 0×3a28213a , 0×6339392c, 0×7363682e look a bit suspicious… Repeating bytes, MSB is never set. This smells ASCII!
Sure enough, here’s what it says:
:(!:
c99,
sch.
I don’t know what the first line means, maybe it’s a little joke in the style of UNIX shell tricks. The second line could possibly be referring to the C99 standard. And the last line is sch again. It’s no doubt related, but how? There could be a deeper meaning to the letters SCH, or it could just be a reference back to that forum post. What do you think?
Studio monitors, M-Audio BX5a
December 25th, 2008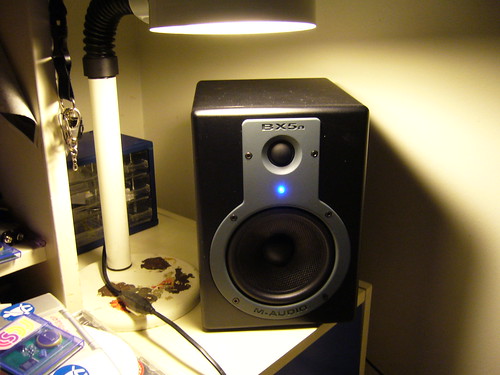
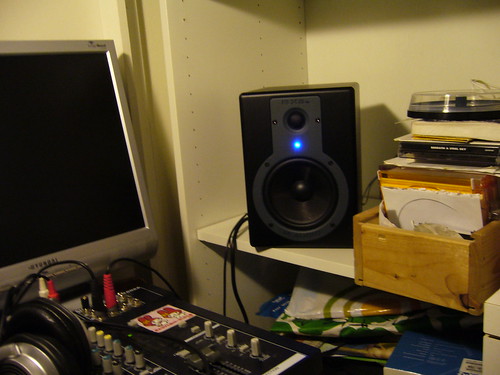
This is my Christmas present for myself, a pair of studio monitors. (That’s music-ish for a pair of reference speakers used to monitor the sound in case you didn’t know ![]() ) They’re a budget model, but I got them for half the price because the store was buying mark II of the same model and had to get rid of the old ones. I didn’t get around unpacking them until pretty late in the night, so I haven’t been able to test them properly yet. (Bass turned down on the mixer, low volume output - don’t want to upset the neighbours) But as far as I can tell they sound ok, absolutely better than anything I owned before. The overall sound image is balanced, but they lack in the sub department. Which is only natural since the job of studio monitors is to be a reference to work by when producing and mastering sound, not to provide a booming bass for listening experience. And they sound good even on low volume levels. They’re also compact, which fits my lifestyle well.
) They’re a budget model, but I got them for half the price because the store was buying mark II of the same model and had to get rid of the old ones. I didn’t get around unpacking them until pretty late in the night, so I haven’t been able to test them properly yet. (Bass turned down on the mixer, low volume output - don’t want to upset the neighbours) But as far as I can tell they sound ok, absolutely better than anything I owned before. The overall sound image is balanced, but they lack in the sub department. Which is only natural since the job of studio monitors is to be a reference to work by when producing and mastering sound, not to provide a booming bass for listening experience. And they sound good even on low volume levels. They’re also compact, which fits my lifestyle well.
So yeah, at any rate I’m satisfied since this is a step up for me.
Perler Bead Christmas Crib
December 25th, 2008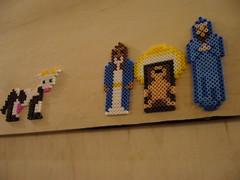
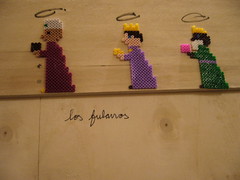
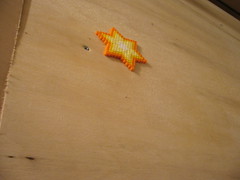
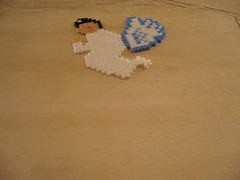

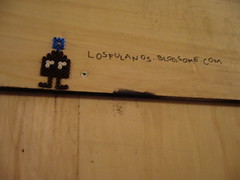
This is the Christmas myth told in Perler Beads. Found in the tunnel under Årstabron, near Tantolunden in Stockholm, Sweden. Apparently made by Los Fulanos.
Perler Beads are getting more popular, and so is pixel art. Coincidence? I think not!
Frankenstein’s Headphones
December 22nd, 2008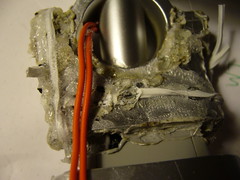
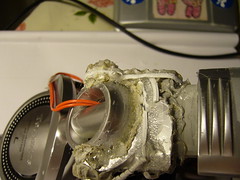
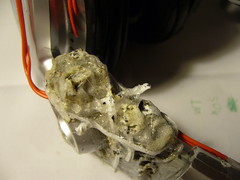
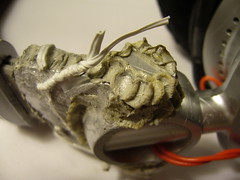
When I originally got these from a friend, they were physically intact, but one wire was broken due to excessive use. So he donated them to me so i could fix them and use them (I didn’t have any decent headphones at the time.) I fixed them by replacing the internal wires with thick, durable copper wires that I placed externally. That’s the orange wires that run into the earpiece.
Everything was fine and dandy for a few months until a crack in the plastic so big that the left earpiece fell off. My first temporary solution was to use tape to keep everything together. It worked, but it wouldn’t sit tight.
Time for the next fix. First I tried super glue which worked at first but soon fell apart. So I proceeded to welding the plastic together with a soldering iron. I also reinforced the plastic with some steel wire. The result is that the plastic is welded into one solid piece, which will hopefully last for a long time.
And it also looks sort of dirty. Since these headphones could’ve died 6 months ago, but I revived them at least twice, I hereby officially dub them “Frankenstein’s Headphones”. After all, the membranes were, and still are working perfectly, so why throw the headphones for something as silly as a broken cable or some cracked plastic?
Tomorrow though, i’ll be getting something better. You’ll see.
PCB Manufacturing at my university (Pictures)
December 19th, 2008So I etched a PCB at my university today, and i thought I’d share some pictures. Today’s PCB is an XR-2206 Based Voltage Controlled Oscillator, a rad oscillator synth module.
The manufacturing process involves several transfers: Paper -> Photographic film -> Photoresist -> Copper. Let’s begin with a picture of three of the steps, the printed paper, the film and the finished PCB.
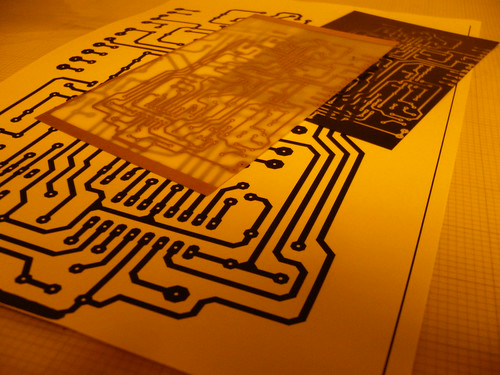
So the first thing I have to do is print the layout on paper. It needs to be printed with high contrast and dense blackness to transfer well to the photographic film. For this PCB I chose to do the transfer double sized to increase the contrast, but you can transfer it with a 1:1 size source printout. (Or anything between)
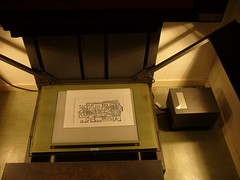
 The next step is to expose the photographic film. This is done with a device consisting of a glass plate under which you put the original, and a lid under which you put the film. Both the glass and the lid have vacuum suction to keep the paper and film in place.
When you press a button, two light sources are turned on to expose the film. The light is reflected against the source material through a lens, and onto the film. The film is, as far as I know standard black and white photographic film. In other words, this device is a giant camera.
The next step is to develop the film. This is done by putting the film first in a “developer” fluid to make the image visible, and then in a “fixer” fluid to protect the film from light. Until the film has been completely developed, the photo room must be lit strictly using a faint red light to avoid exposing the film by accident.
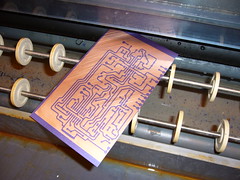

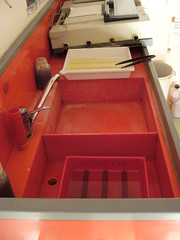
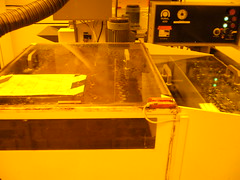 Next up is transferring the image on the film to the photoresist on the board. Unfortunately I forgot to take a picture of this step, but it’s done by exposing the photoresist to UV light through the film. The photoresist will be weakened in all areas exposed to the UV light. The weakened areas will then be etched away using a CaCO3 (Calcium carbonate) solution in the first etching machine. The result is that the copper is exposed at those parts. (Left picture) And then I put it through the second etching machine, containing iron chloride, which will etch away the exposed copper areas. (Right picture)

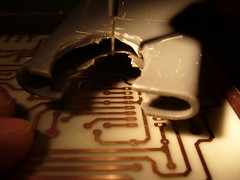
Almost done. The last step is to put the board into a stripper fluid (NaOH, Sodium hydroxide) to remove the remaining photoresist.
After drilling the holes the PCB is ready to be equipped with components.
Cadsoft Eagle libraries for synth makers
December 12th, 2008When looking for an Eagle library containing the transconductance op amp CA3080 for a little thing i’m building, I found synthdiy.lbr which is library containing a number of useful chip layouts. Eg, 2SA798, 2SA1349, 2SC1583, 2SC3381, AD633, CA3046, CA3080, CA3280, IT120, LM394, LM2931, LM4040, LM13600, LM13700, LS318, LT1013,
PAN9MMPOT, TLV5618A.
Might be useful to someone.
![You suck at protoshop. No, you [i]really[/i] oo.](http://blog.gg8.se/images/you-suck-at-photoshop-you-really-do-your-awful.png)


